Author: TechLoomyFun Editorial Team
Sending an old phone or computer to a repair shop can feel simple: pack the device, hand it over, and wait for the repair. The part that deserves more attention is everything stored inside it.
A phone may contain private photos, messages, saved passwords, authentication apps, banking applications, email accounts, and access to social media. A computer can contain documents, browser sessions, work files, downloaded information, and personal accounts.
The safest approach is to prepare the device before it leaves your hands. That does not always mean immediately performing a factory reset. The right steps depend on whether the device still works, what kind of repair is needed, and whether the technician needs access to the operating system for testing.
This guide explains what to check before sending an old phone or computer for repair, including what to back up, what to remove, when to sign out, and when a reset is appropriate.
Start by Finding Out What the Repair Requires
Before changing anything, contact the repair provider and ask what they need from you.
A screen replacement may require the technician to test the display, touch input, cameras, speakers, charging, or other functions after the repair. A storage or operating-system problem may require more access.
Do not automatically give a technician your main account password just because they say they need access to the device.
For example, Apple specifically says not to give an Apple Account password or device passcode to another person. If software support requires access, Apple advises remaining present while the technician has access.
Google’s Pixel Repair Mode provides another example of how some devices can be prepared without exposing normal personal data to the technician.
The important lesson is to ask:
What exactly needs to be tested, and what access is actually necessary?
That question can prevent both unnecessary data exposure and unnecessary resets.
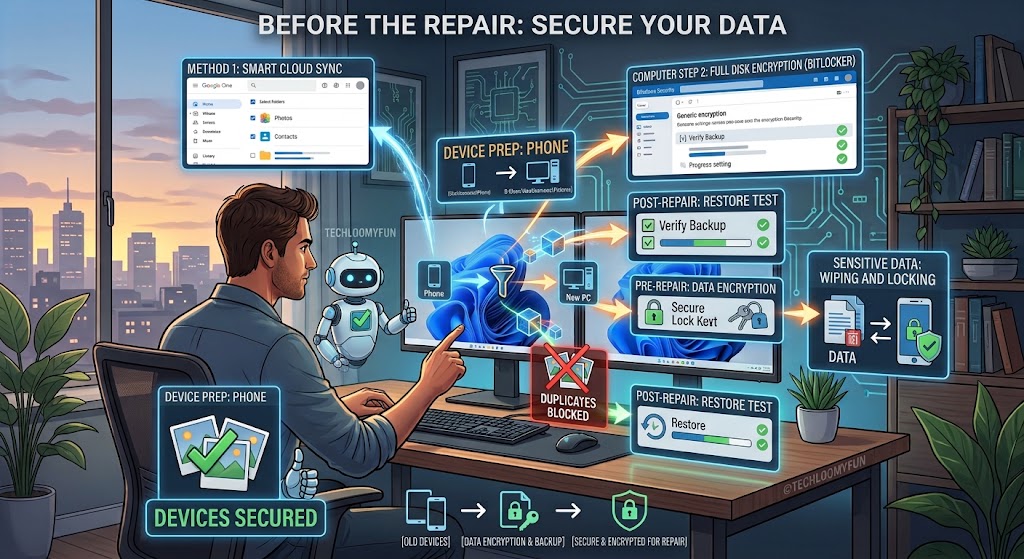
Back Up the Device Before Doing Anything Else
If the phone or computer still works, start with a backup.
This is the most important preparation step because repairs can sometimes result in data loss, especially when storage components or the operating system are involved.
Google recommends backing up a Pixel before repair, even when Repair Mode is being used, because certain repairs can still require data to be deleted.
Microsoft gives similar advice for Surface devices and recommends saving important files to another computer, external drive, or cloud storage before service. Microsoft also warns that data may be erased during the service process.
Check that the backup actually completed
Do not assume that selecting a backup option means everything is safely stored somewhere else.
After the backup finishes, check a few important items.
Open your cloud storage or backup service and confirm that recent files are present. Check several photos from different dates. Look for important documents. Confirm that contacts, notes, or other information you cannot easily replace are available.
If you are backing up a computer manually, open some copied files from the backup location.
A backup that cannot be restored is not much help when something goes wrong.
Make a Short List of Important Data
Before handing over the device, think beyond photos and documents.
Depending on what you use the device for, important information may include:
- Photos and videos
- Documents and PDFs
- Downloads
- Contacts
- Notes
- Messages
- Browser bookmarks
- Work files
- Password-manager information
- Authentication information
- Application data
- Local email files
- Desktop files
- Files stored outside your normal Documents folder
This is also a good time to check for files stored in unusual locations.
On Windows, for example, something important may be sitting in the Downloads folder or on the desktop rather than inside a cloud-synchronized folder.
Do not assume that because you use cloud storage, every file on the device is automatically backed up.
Check Which Files Are Only on the Device
Cloud storage can make this confusing.
A file may appear in a cloud-storage folder without necessarily being stored locally in the same way as another file. Some services use online-only files to save local disk space.
Before repair, identify files that you would need even if the device never turned on again.
If an important file exists only on the old computer, copy it somewhere else before sending the machine away.
For a phone, pay particular attention to photos and videos that may not have finished syncing.
Do not delete the originals simply because you can see some of your photos on another device. Open the cloud service and verify that the recent files are actually there.
Protect Your Accounts Before the Device Leaves Home
The next step is account security.
Think about what remains signed in on the device.
A browser might have access to your email, social networks, shopping accounts, cloud storage, and other services. A phone may also contain banking apps, payment applications, messaging accounts, and authentication tools.
If the device will be out of your control for an extended period, review the accounts that are signed in.
Where appropriate, sign out of sensitive accounts before sending the device away.
However, do not start removing accounts blindly. Some repair processes require a particular account to remain associated with the device, while some manufacturers require security or device-lock features to be disabled before service.
Follow the repair provider’s official instructions for your specific model.
Never Hand Over Your Main Password
A repair technician may need to test the device, but that does not mean they should receive your email password, banking password, password-manager master password, or Apple/Google/Microsoft account password.
If a technician needs the device unlocked for testing, ask whether you can unlock it yourself when testing is performed.
Apple explicitly states that Apple and Apple Authorised Service Providers will not ask for your Apple Account password or device passcode.
Google’s Pixel Repair Mode is designed to let eligible devices enter a limited repair environment without giving the technician your normal lock-screen credentials. Google also specifically says not to share the PIN, password, or pattern with the technician.
If a repair shop insists on receiving your primary account password, stop and ask why it is necessary.
There may be another way to perform the repair.
Use Repair Mode If Your Phone Supports It
Some newer phones have a dedicated repair mode.
Google’s Pixel Repair Mode is one example. Eligible Pixel phones can enter a separate environment intended for servicing and diagnostics while helping protect personal information. Google says eligible Pixel phones include models running the Android 14 December 2023 update or later with at least 2 GB of available storage.
If your phone offers a similar feature, check the manufacturer’s current instructions before the repair.
Do not assume that every Android phone has the same option.
Menu names, supported models, and requirements can vary by manufacturer and software version.
Even when Repair Mode is available, keep your backup. Google recommends backing up before repair because some repairs can still require data deletion.
Remove Your SIM Card
Before sending a phone for repair, check the SIM card.
If the SIM is removable, take it out and keep it with you unless the repair provider specifically instructs you otherwise.
Google recommends removing the SIM card before sending a Pixel phone for repair.
If you use an eSIM, the process can be different. Do not delete an eSIM simply because you are preparing the device for repair. Check the manufacturer’s instructions and your mobile carrier’s requirements first.
The goal is to prevent unnecessary loss of cellular service while the phone is being repaired.
Remove Memory Cards and Accessories
Check every slot and port before packing the device.
A phone or computer may have an SD card, USB drive, external storage device, keyboard, mouse, dock, charger, headphones, or other accessories attached.
Do not leave personal storage media inside the device unless the repair provider specifically requires it.
Microsoft’s Surface repair instructions, for example, tell customers to remove memory cards, USB devices, docks, power supplies, headphones, and other accessories unless the service instructions specifically say to include them.
This is also a practical way to avoid losing an accessory during shipping.
Take Photos of the Device Before Shipping
Before packing the device, take several clear photos of it.
Photograph the front, back, sides, ports, corners, and any existing scratches or cracks.
You do not need to create a professional inspection report. The purpose is simply to document the device’s condition before it leaves your possession.
If the repair company gives you a service receipt or intake document, keep it.
Write down the device model and serial number if available.
For some phones, an IMEI may also be useful. Google, for example, recommends finding the Pixel’s IMEI before repair.
Keep these details somewhere separate from the device.
Decide Whether the Device Should Be Erased
This is where you need to slow down.
A factory reset removes personal information from many devices, but it can also remove the information a technician needs to diagnose the problem.
The correct decision depends on the repair.
If the repair provider can work without your personal data
A factory reset may be the safest option when practical.
For example, if the phone only needs a physical component replaced and the repair provider does not need your personal environment for diagnosis, wiping the device may reduce the amount of private information exposed.
If the technician needs the operating system for diagnosis
Do not reset the device without asking first.
A technician troubleshooting an application crash, software problem, boot problem, display problem, or hardware issue may need to reproduce the fault.
Some devices offer a dedicated repair environment specifically for this situation.
If the device cannot turn on
The process becomes more difficult.
You may not be able to back up or erase everything yourself.
Google says that if a Pixel cannot be reset before repair, signing out of the Google Account and allowing the repair process to reset it may be an option, depending on the situation.
Microsoft similarly notes that if a Surface cannot start, you may not be able to back up files stored only on that device.
In this situation, tell the repair provider clearly that the device contains personal data and ask what they can do without accessing it.
Be Careful With Banking and Authentication Apps
Phones are often more sensitive than computers because they can act as keys to other accounts.
Before repair, consider how you will access important accounts if the phone remains unavailable.
If your phone contains an authentication application, make sure you understand your recovery options before removing or resetting anything.
Do not uninstall an authentication app or delete its data simply because you are preparing the phone for repair.
Some authentication systems have their own backup or transfer procedures. Follow the instructions for the specific service before making changes.
The same principle applies to banking apps and payment services.
You do not necessarily need to delete every financial app, but you should understand what access remains on the device and whether the repair provider actually needs it.
Check Your Browser Sessions
A computer sent for repair may still be signed in to your browser.
That could provide access to email, cloud files, shopping accounts, social media, and other services.
If the computer will be outside your control and you cannot safely remove those sessions locally, consider reviewing active sessions from another trusted device.
For important accounts, check the provider’s security page for currently signed-in devices.
If you see something unfamiliar, secure the account rather than assuming it is related to the repair.
Do Not Delete Everything in a Panic
There is a common mistake on the other side of privacy protection: deleting things before understanding what they are.
Do not randomly remove system folders, browser data, account files, or applications because you want to make the device “clean.”
You could make the original repair problem harder to diagnose.
Do not erase the device before confirming that your backup works.
Do not remove an account if doing so could trigger a security lock or complicate the repair.
Do not disable security features unless the manufacturer’s repair instructions specifically require it.
And never give a technician your main account password simply to make the process easier.
What If You Cannot Back Up the Device?
If the device still works but storage is nearly full, start with the most important files.
You do not necessarily need to copy every file immediately.
Save irreplaceable photos, documents, work files, contacts, and other information that would be difficult to recreate.
If the device is unstable, avoid spending hours organizing everything before the repair. Prioritize the information you cannot replace.
If the device is failing physically and repeatedly shutting down, stop using it if continued use could make the problem worse.
For a damaged storage device, repeated attempts to boot, copy, or repair it can sometimes complicate professional data recovery.
If the information is extremely important and there is no backup, ask a qualified data-recovery professional before authorizing actions that could overwrite or erase the storage.
What to Give the Repair Technician
Give the technician enough information to understand the problem, but not unnecessary access to your personal life.
Write down the actual symptoms.
For example:
“The computer freezes for about five seconds when opening File Explorer.”
Or:
“The phone restarts when I connect the charging cable.”
This is much more useful than simply saying, “It is broken.”
Also mention when the problem started, whether it happens every time, and anything that changed shortly before it began.
If you recently installed an application, updated Windows or Android, dropped the device, exposed it to liquid, or replaced a component, mention that.
Do not hide physical damage or previous repair work. It may affect diagnosis.
Pack the Device According to the Repair Instructions
Once the data and account side is handled, prepare the physical device.
Follow the repair provider’s packaging instructions rather than using a random box and loose padding.
If the provider supplied a shipping package, use it as instructed.
Microsoft, for example, provides specific packing instructions for Surface devices and warns customers to remove certain accessories before shipment.
Do not place loose cables, SIM cards, memory cards, or personal storage devices in the box unless the repair instructions require them.
Keep your shipping receipt and tracking information.
What to Check When the Device Comes Back
The preparation process does not end when the repair is finished.
Before leaving the repair center or accepting the returned device, inspect the exterior.
Check the screen, frame, ports, buttons, camera glass, keyboard, and other areas that were involved in the repair.
Then test the original problem.
If it was a charging problem, test charging.
If it was a display problem, test the display and touch input.
If it was a Wi-Fi problem, connect to a network.
If it was a camera problem, test the camera.
Do not assume that because a part was replaced, the original problem is automatically fixed.
If the device was erased, restore your data from the backup rather than trying to reconstruct everything manually.
Apple notes that an iPhone or iPad may be erased during service and may need to be restored from an existing iCloud or computer backup afterward.
Microsoft similarly explains that serviced Surface devices may need Windows setup, updates, file restoration, and application reinstallation.
A Simple Final Check Before You Hand It Over
Before leaving home, ask yourself:
Is my important data backed up?
Have I checked that the backup actually contains recent information?
Have I removed my SIM and memory cards where appropriate?
Have I removed unnecessary accessories?
Have I protected my account passwords?
Does the repair provider really need the device unlocked?
Does my phone or computer have a repair mode or manufacturer-specific service procedure?
Have I documented the device’s physical condition?
Do I know what the technician needs to test?
Do I have the repair receipt or tracking information?
If you can answer these questions confidently, the device is much better prepared to leave your hands.
When You Should Stop and Ask for Specialist Help
There are situations where trying to prepare the device yourself can create more risk.
If the device contains irreplaceable files and there is no backup, consider professional data-recovery advice before resetting or repeatedly trying to repair it.
If the device has been exposed to liquid, stop using it if continued operation could cause further damage.
If the storage is failing, avoid experimenting with recovery software unless you understand the risks.
If a repair provider asks for unusual account credentials, ask exactly why they are required and whether there is a safer alternative.
For warranty repairs, use the manufacturer’s official service instructions whenever possible. Requirements can vary by model, country, warranty status, and repair partner.
Frequently Asked Questions
Should I factory reset my phone before sending it for repair?
Not always. First ask the repair provider whether they need access to the operating system for testing. If a factory reset is appropriate, make sure your important data is backed up first.
Should I give the repair technician my phone PIN?
You generally should not share your personal security credentials. Some manufacturers provide repair-specific options that let technicians perform diagnostics without giving them your normal password or PIN. Google’s Pixel Repair Mode is one example.
Should I remove my SIM card before repair?
If it is removable, keeping it with you is generally sensible unless the repair provider specifically tells you otherwise. Google recommends removing the SIM before Pixel repair.
What if my computer will not turn on?
You may not be able to back up files stored only on the computer. Tell the repair provider that the device contains important personal data and ask about data-preserving options before authorizing a reset or storage replacement.
What should I do if the repaired device comes back wiped?
Restore it from your verified backup. Do not start creating a completely new backup over your old backup until you understand what information is already available. Apple specifically warns that setting up a device as new and then creating new backups can affect the ability to restore an older backup.
Final Thoughts
Preparing a phone or computer for repair is really about separating two jobs: getting the hardware fixed and protecting the information stored on it.
Back up important data first. Confirm the backup. Remove SIM cards, memory cards, and unnecessary accessories. Protect your account credentials. Find out what the technician actually needs to test. Use a manufacturer’s repair mode when your device supports one, and only reset the device when you understand what the reset will remove and whether the repair requires it.
The safest repair is not simply the one that fixes the broken part. It is the one where you know what information is leaving your hands, what the technician needs access to, and how your data will be restored afterward.
Authoritative Sources to Reference
- Google Pixel Help — Repair Mode and preparing a Pixel for repair.
- Apple Support — Preparing an iPhone or iPad for service.
- Microsoft Support — Preparing a Surface for service and protecting data.